Step by step tutorial on how to setup your Node.js project in Eclipse IDE
This tutorial shows you how to setup a professional web application project using Node.js and Express framework in a Eclipse IDE
Prerequisites
First Download and install
Node.js on your machine if you haven’t already.
Then install Express framework using Node.js Command Line:
$ npm install -g express
Now Download Eclipse IDE for EE Developers, the Juno package from
here.
It can be any other Eclipse packages but I recommend using Eclipse EE
Juno packages as it comes with many web development packages.

Eclipse IDE
Install Node Eclipse
Update: node eclipse has a new eclipse IDE called Enide, prepackaged with all necessary softwares.
download Enide from
http://www.nodeclipse.org/enide/studio/2014/ and come back for rest of tutorial here to learn how to use it

1. Drag and drop

into a running Eclipse (menu area) to install Nodeclipse. Or from Eclipse Menu click Help > Install new softwares

Eclipse Help Menu
2. Enter the update site URL into the Work
with text
Box: http://marketplace.eclipse.org/marketplace-client-intro?mpc_install=1520853
UPDATE: for the latest version read this page http://www.nodeclipse.org/updates/
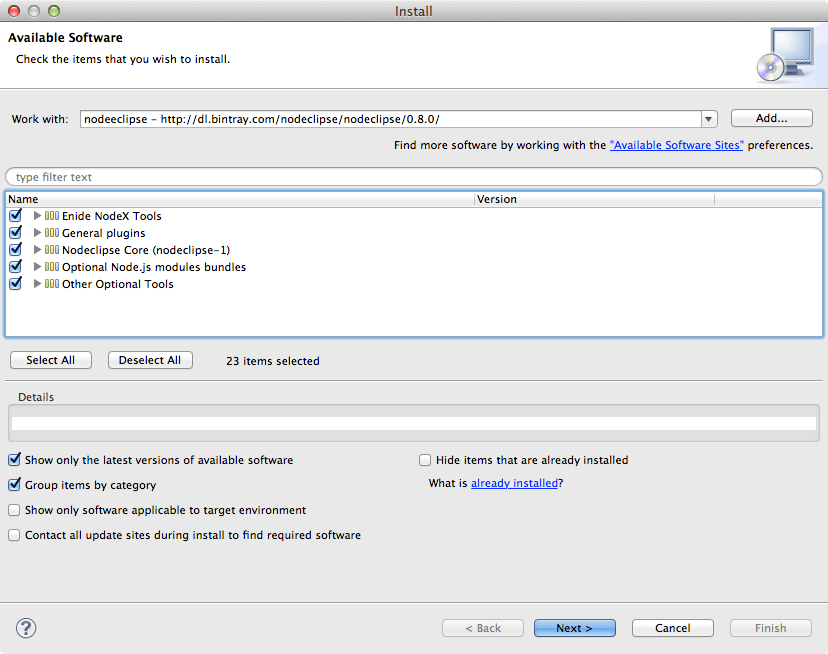
Uncheck
“Contact all updates site during install to find required software” to make installation quicker.

InstallingNodeEclipse
You should see centre box filled with the list of plugins, first
three are essential and the rest are optional. Select the appropriate
and click next.
3. Review features and accept the licence.
4. You will be ask if you would like to restart Eclipse, click Restart Now.
5. After Eclipse restarts switch to Node perspective: menu >
windows > open perspective > other and select Node perspective.
Creating a new Node Project
from Eclipse menu select: file > new > Node Express Project

newNodeProject
Choose a name and location for your project and select a template for
your your HTML files. You have two options of Jade template or ejs
template. I recommend ejs but it is totally up to you. If you don’t have
experience about these templates read more here:
EJS Template Jade Template
Select your template and click finish.
You should see Eclipse starts to add required library for everything
shown in console panel as well as a nice structured Node.js app under
Project Explorer panel.

Node.js App in Eclipse
In order to run the project as localhost we need to add a run configuration.
From Eclipse menu select: Run > Run Configurations

run Configurations
Select Node Applications from Left side list and click on ‘add new configuration’ icon.
you should see the right side settings appears. Click on search and
search for app.js which is our Node application in this project then
click run.
On the console you should see a message like: Express server listening on port 3000
Now you can see your web app running on localhost port 3000
congratulations, you have your Node.js app running on: http://localhost:3000

Node Express App
Explaining Project Structure
If you are familiar with a Model View Controller (MVC) project structure, this is very similar to it.

Node Project Structure
- Looking at the project explorer panel, from the top we have
JavaScript resources folder. This is where all JavaScript libraries
default to Eclipse is located.
- Then we have public folder. This is where all the public files such
as css and JavaScript files that anyone can access are located.
- Next folder is ‘routes’. This is where you implement your routing system with their own functionalities.
- Next is ‘Views’ folder where all the view files are located.
Depending on your template system you choose when creating the new
project it can be ejs file or jade files.
- Then we have our core Node.js application functionalities inside the
app.js file. This is the file that we run in order to run the
applications.
- Finally we have the package.json file which is our standard Node.js file for managing all the packages and libraries.
I hope this was useful. In next tutorial I will show you guys how to
use this project and build a complex Node.js web app that is responsive
to all devices using the famous twitter bootstrap.
Any question please leave a comment


Comments
Post a Comment